

| . |

| Magnetec Inspection, Inc. |

ACFM
| CORROSION |
| CORROSION |
| TANK FLOOR |
| PIPING |
| CHILLERS |
| TANK FLOOR |
| CHILLERS |
| PIPING |
| ECT |
| ECT |
| REMOTE FIELD |
| REMOTE FIELD |
| Magnetec Inspection, Inc. |


| SLEEVING |
| SLEEVING |
| ACFM |
| ACFM |
| Crack Depth Measurement Using ACFM: |

| ALTERNATING CURRENT FIELD MEASUREMENT |
AC field measurement (ACFM) is a recently developed electromagnetic technique which offers the capability of detection
The detection of surface and slightly sub-surface cracks by the Eddy Current Technique has been successively utilized by
The Eddy Current response is based on the inter-action of the parent material and the electrical condition of the probe as it passes
material with no defect or in the presence of a crack/corrosion.
material with no defect or in the presence of a crack/corrosion.
As the inspection probe encounters a defect the probe delivers a response,
correlated to the defect in question. Interpretations of these components
provide the inspector with information of the defect type, orientation, extent,
and depth.
correlated to the defect in question. Interpretations of these components
provide the inspector with information of the defect type, orientation, extent,
and depth.
using ACFM or Eddy Current techniques are based either on the use of calibration cracks or on the estimation of crack
A major drawback in using the surface crack length (whether determined from the eddy-current probe response or directly from
in-situ metallography) to infer crack depth is that the assumed length-to-depth ratio may be incorrect for the particular crack under
investigation. For example, the crack depth will be over estimated if the crack has grown through coalescence of shallow cracks
having multiple origins rather than through the growth of a single crack, or may be underestimated if the crack has initiated from
an unexpected sub-surface defect. A further question is what length-to-depth ratio should be assumed in the absence of any
fractographic or detailed fracture mechanics information. Such problems are less severe in the case of quadrant or corner cracks,
where the crack intersects two surfaces and abnormal crack geometry can be more easily ruled out.
In principle it is possible to estimate crack depth by comparing the eddy current signal from an unknown crack against data from
a calibration crack of the same surface length in the same component, presuming the depth of the calibration crack is already
known and that materials factors such as crack closure, crack branching and crack-face contact are equivalent. In practice, such
a library of calibration cracks is rarely available; however, defect response and signal presentation can be utilized in conjunction
to give fairly accurate crack configuration, depth and extension information.

extension of Eddy Current inspection techniques with the uniform injected current replaced by a uniform field induced by a driver
coil and the contact electrodes replaced by a set of orthogonal pick-up coils. The measurements are performed by scanning the
probe along the crack face.
coil and the contact electrodes replaced by a set of orthogonal pick-up coils. The measurements are performed by scanning the
probe along the crack face.
| Eddy-Current Crack Measurement: |
many different industries (aerospace, automotive, etc.) for over 20 years. The ability of detecting surface breaking cracks basically
involves passing a coil(s) of correct design and orientation over a defect where the operating characteristics change and are
presented to the equipment operator.
involves passing a coil(s) of correct design and orientation over a defect where the operating characteristics change and are
presented to the equipment operator.

| Current Methods for Practical Crack Sizing... |
depth from measurements of the surface crack length assuming that the crack has a known aspect ratio. Both approaches have
limitations.
limitations.
| MII Inc. |
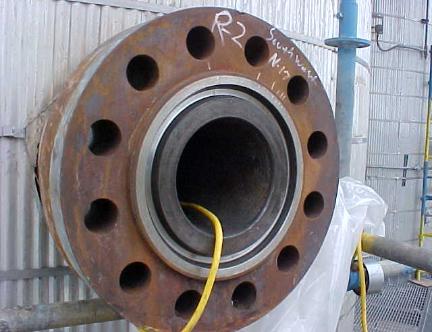
| Nozzle #3 |
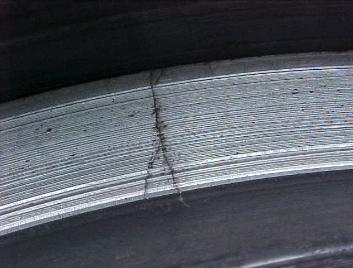
Crack Face
| Single Crack with Defined Branching |
| Angles Groove Surfaces |
Enlarged Photo of
Single Crack Face
Single Crack Face
| Multiple Cracks with Branching and Inter-granular Attack |


| Below is a discussion of ACFM & Eddy Current Test techniques which can be utilized for the inspection of surface breaking cracks in Ferrous & Non-Ferrous Materials. |
Multiple Crack Locations
and Inter-connection of
Cracks
and Inter-connection of
Cracks
| Groove Bottom |
| Groove Bottom |
| Below is a discussion of ACFM & Eddy Current Test techniques which can be utilized for the inspection of surface breaking cracks in Ferrous & Non-Ferrous Materials. |


